Botanical Printing with Cyanotype
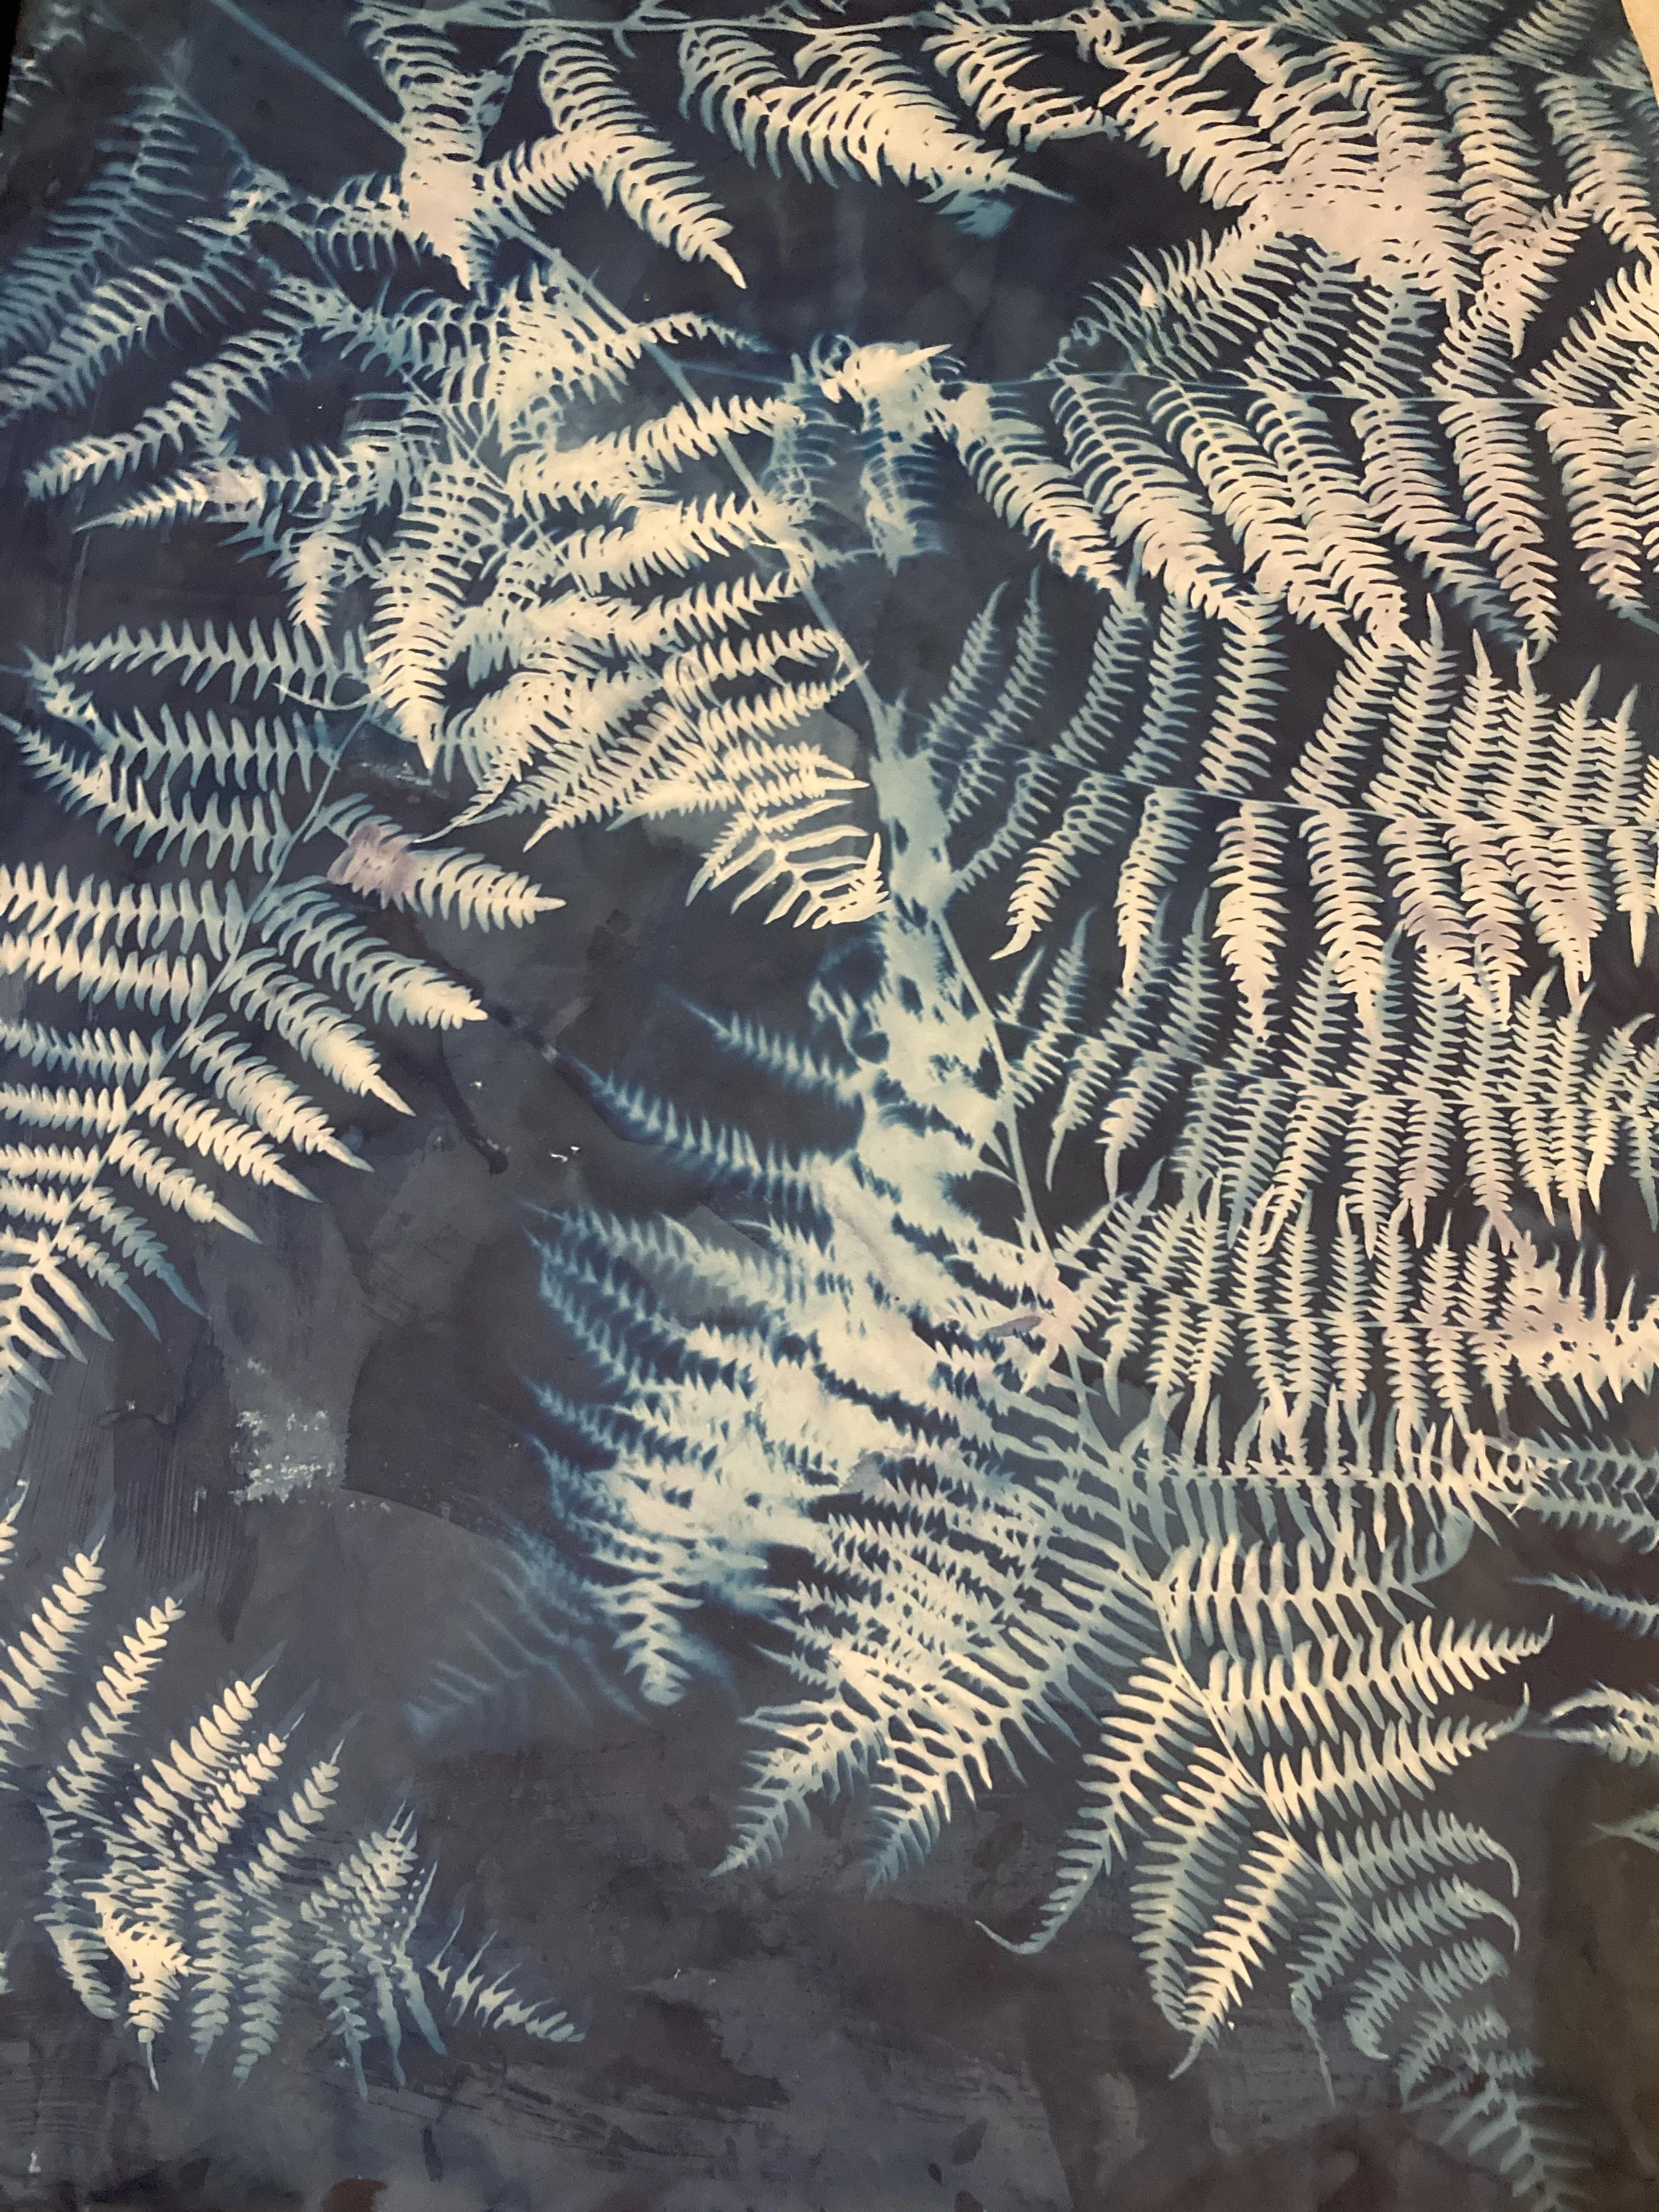
Bracken I, 2024 18×24”, Cyanotype process on Vellum
As an artist trained in scientific illustration techniques, most of the work I do is slow and meticulous with an eye for realism, or at least representational realism… so it’s a relief sometimes to indulge in a creative process that’s a lot wilder—way faster and far less predictable. If done outside in the sunshine and with actual plant material, it feels like a process in direct collaboration with nature. However you can also use a UV lamp and printed photo negatives…
Fair warning: cyanotype is a fun scientific process to witness every single time, and the “instant gratification” of developing cyanotype prints is addictive...
HISTORY
Printing with cyanotype is a historical method of alternative photography. It was discovered in the 1840s by polymath scientist Sir John Herschel as an alternative photographic process. A friend of the Herschel family, Anna Atkins, used the process to create accurate (and beautiful) images of local plant life and seaweeds, which she published in a book within a year. It’s pretty remarkable that although it was invented by a man, it’s a woman who’s the first person people often think of when they learn about Cyanotype.
Of course, architects have also used the cyanotype process for many decades to create blueprints—accurate 1:1 scale reproductions of their building plans.
The end result is paper or cloth stained with a beautiful deep Prussian blue background wherever sunlight touched, and white “shadows” where the sunlight was blocked and couldn’t reach—and from where the unreacted solution gets rinsed away. UV light is the catalyst here that causes a couple of chemical reactions to occur in sequence (I’m not going to get into the specifics, but in short, it’s 2 different iron salts that are oxidizing and reducing in the presence of UV light) resulting in Prussian blue pigment.
Even though you might hear the word “cyanide” thrown around, don’t let that fool you, it’s actually non-toxic… The cyanide involved is bound up so tightly to iron molecules that it’s incredibly stable. Odd fact: Prussian blue pigment, ferric ferrocyanide, is even used as medicine in cases of radiation poisoning.
Cyanotype is a very accessible artistic medium, since you don’t need much in the way of expensive equipment, and it lends itself well to lots of experimentation and mixed media. It’s also fully archival. You can use it very scientifically or very artistically or some combination, it’s all up to you.
If you mix the chemicals carefully yourself and treat the paper, the rest of the project can be done safely with children and without PPE. You may want to wear gloves as the solution may stain your hands blue, but it’s otherwise harmless.
The sensitizer set can be purchased at most art stores, I recommend the Jacquard Cyanotype Sensitizer Set available from Opus Art Supplies. Read on for a lil’ discount code if you’d like one.
MATERIALS
Jacquard Cyanotype Sensitizer Set
Tap water (in the sink or bathtub, or in a plastic washbasin if outdoors)
Measuring spoon (not for food)
Gloves (if desired)
Plastic tablecloth
Small bowl
Hake Brush
Acid-free Cotton Watercolour Paper, Cotton canvas, cloth, or other natural light-coloured porous material to print on.
Metal fold back clips or bulldog clips
2 Cardboard boxes (to keep treated paper in the dark, and to keep exposed prints until development)
Ziplock bag (to keep treated paper in airtight conditions while in the cardboard box)
Plastic or cardboard backing, for support
Pane of glass from a picture frame (optional)
Plant material (ethically sourced, please) or photo negatives or drawings printed onto transparencies
Black acrylic markers or ink for drawing onto transparencies (optional)
UV LED lamp, or a sunny day
Sink or bathtub (if you’re doing the project with a group, you may want up to 3 plastic dishwashing tubs large enough to accommodate your largest print).
3% solution of Hydrogen Peroxide (optional)
String or clothesline to hang your prints from to dry
DIRECTIONS
PREPARATION STAGE
Open the package of sensitizer and fill both bottles (A and B) with cold tap water “to the shoulder” and tightly replace the caps. Shake each bottle well. Ideally wait up to 24h to proceed.
In low lighting, set up your solution, bowl, paintbrush, papers, and a covered surface to work on. This is good to do after dark in the evening the night before you plan to make your prints, working at a table with a just a household lamp on in the corner.
The concentrations of both chemicals have been pre-mixed so you only need to mix them 50-50, a 1:1 ratio, no math involved. Into a measuring spoon, pour out half as much volume of sensitizer as you think you will use, starting with solution A. Tip into a bowl. Do the same with solution B and stir them together.
Using your Hake brush, apply this solution to watercolour paper. You can do this evenly and carefully or “creatively” with rough edges, spatters and drips. The dye will be a sort of chartreuse green at this stage.
Allow the papers to fully dry in the dark overnight.
Gather the dry papers and store them in a dark place (cardboard box) until you’re ready to use them.
If you’re going to be using transparencies, prepare your negatives and print/draw on them ahead of time. The Jacquard set has a QR code on the package that leads to software that will create your negatives for you from your uploaded files. So convenient!
EXPOSURE STAGEGather plant material and/or transparencies together with your box of prepared papers, backings, glass, and clips
If working outside: take this to an area of deep shade next to an area of bright sun. Ideally, middle of the day without much wind.
If working inside, set up a UV lamp to hang directly over your print. You may like to engineer a cardboard box with a hole in the top.
Place a prepared sheet of paper onto a backing board, arrange plant material on top in a pleasing composition (or your negatives on transparency) and secure a piece of glass (optional) on top with clips.
Expose your print to UV rays in sun or with a UV lamp. Exposure times will vary. Usually you only need a few minutes. The dye will change from green to a sort of bronze colour when it’s ready. If you move a bit of the material from on top, you’ll see a strong image of the shadow beneath.
Bring your print back into the shade and put it into another dark cardboard box, until you’re ready to rinse it.
DEVELOPMENT STAGEPut the print into a water bath and move it vigorously back and forth, or run it under flowing tap water. The exposed area will quickly turn blue, unexposed areas that were in shadow will rinse away and there the paper will remain white.
In theory, you can fade and tone your cyanotypes to change their colour or intensity using household materials such as baking soda, coffee, tea, even bleach, but this is beyond my experience level. I wonder if using substances to change the pH could potentially affect the long-term archival nature of the print.
You may want to accelerate the development process and darkening of the Prussian blue by adding a small amount of 3% hydrogen peroxide to the rinse water. This step is not strictly necessary as the paper will darken as it dries over the next 24h. However it’s a very fun step!
Hang your papers to dry! If the paper curls once it’s dry, you can lightly wet the back with plain water on a clean paintbrush, and place it between towels and place a book on top overnight.
If you want, you could re-treat your print at this point with more sensitizer for a double-exposure!
MIXED MEDIA CONSIDERATIONSWatercolour paper will take most other media nicely. You can add coloured pencils, watercolour (of course), gouache, pastels, or acrylic paint. Interference paints look gorgeous on cyanotype. You could even add gold or other metallic leaf if you wanted.
You can use your prints as collage material. Vellum is particularly nice for this. Acrylic mediums will help everything stick down.
If you’re printing onto raw canvas, this can be stretched onto a frame (or printed pre-stretched, I suppose) and later painted with acrylics or oils. If you’re using oils, it’s good to use several (3-4) coats of clear gesso on top of the cyanotype print. Printing onto pre-primed canvas is theoretically possible, but I haven’t had success with it yet.
Whatever medium you’re using, Prussian blue pigment is the exact same hue as the cyanotype print. That could be fun to play with mixing Prussian blue with white to create tints and shades (lights and darks) of Prussian blue to add mid-tones to your otherwise starkly contrasting prints. Using Prussian blue as your primary blue and mixing it into a limited palette of yellow and/or red/magenta will create unified colour harmony. You could glaze them transparently or add white to these for more opaque applications.
I really enjoy using iridescent interference pigments on my cyanotypes. These are extremely reflective but react differently when painted on top of light or dark surfaces, and seem to shift when viewed from different angles.
In theory, you can cyanotype onto all sorts of porous surfaces. Egg shells, sea shells, wood, silk, natural fabrics… it could be fun to make sculpture or even installation work with cyanotype.
Use your imagination, stay curious, follow “What if” and see what happens! Everything is an experiment.
GENERAL CONSIDERATIONS
If you plan to frame your prints inexpensively, consider making the prints in standard sizes. These are 5x7”, 8x10” 8.5x11”, 9x12”, 11x14”, 16x20”, 18x24”. These are both standard sizes for frames themselves and mat openings.
When framing, do not use cardboard as a backing in direct contact with your print. Use acid-free foam core, coroplast, or at minimum a sheet of acid-free drawing paper or watercolour paper behind it.
In our humid climate of the Pacific Northwest, it’s best to make sure the print and the glass don’t touch directly. Using a mat or a shadow box frame will help to preserve your print and keep it safe in the long-run.
If you’re using sensitizer solution for prints on fabric, it will soak in and you will require much more sensitizer by volume than if you were only using paper. Lots of it will rinse out.
Boxes from ready-made picture frames (such as those from Opus Art Supplies) make the fantastic light-proof boxes to hold your papers before you expose them. For smaller prints, acid-free photo boxes work well.
Make only as much sensitizer solution as you think you will need. You can always make more. Unused solution will spoil and oxidize within hours.
If you get some on your hands or clothes, just wash them. It’s only permanent once it comes into contact with sunlight.
Prepared papers will keep for a few weeks in the dark place. Ideally, use a ziplock bag inside a cardboard box and they’ll keep for longer.
When preparing photo negatives on transparency, printing two identical transparencies and layering them will produce a much bolder print.
Wear a hat, sunglasses, sunscreen, and long sleeves etc to prevent sunburn while working in direct sun.
You’ll have the best direct prints working with a UV lamp, or working at midday in the summertime (most overhead sun angle) on a non-windy day. If you’re working in the morning or evening, consider setting up your prints at a more direct angle, such as on a hillside, or propping them up somehow to meet the sun’s rays more directly.
You’ll have the best direct prints working on smooth, hot pressed watercolour paper with little texture, with flat (pressed) plant material or transparencies, and using a sheet of glass on top to press everything down. Cold-pressed watercolour paper or canvas will introduce texture into the equation, 3D plant material will cast shadows, and not using glass will introduce uncertainty of plants moving from wind etc.
If you like, you can receive 10% off at Opus Art Supplies if you use code isolinestudios (all one word, lower case) at checkout at opusartsupplies.com or in stores (write down the code and hand it to your cashier), limited to one use per Opus member. I do receive a small commission…
I really hope you’ll give this fun medium a try!